DIY Busy Board: A Guide to Making Your Own

Why Make a Montessori Busy Board?
Busy boards offer numerous developmental benefits for young children:
- Fine Motor Skill Development: Activities like zipping, buttoning, buckling, and turning knobs strengthen small muscles in the hands and fingers.
- Problem-Solving: Figuring out how latches work or how to open a door encourages critical thinking.
- Sensory Exploration: Different textures, sounds, and movements stimulate the senses.
- Independence: Children can explore and learn at their own pace.
- Concentration: Engaging tasks help improve focus and attention span.
Materials Needed
Gather these items before you begin. You can find many of these around your house or at a local hardware or craft store.
1. A sturdy base
Plywood, a large cutting board, or a piece of sturdy cardboard (for a lightweight version).
2. Assorted items for activities
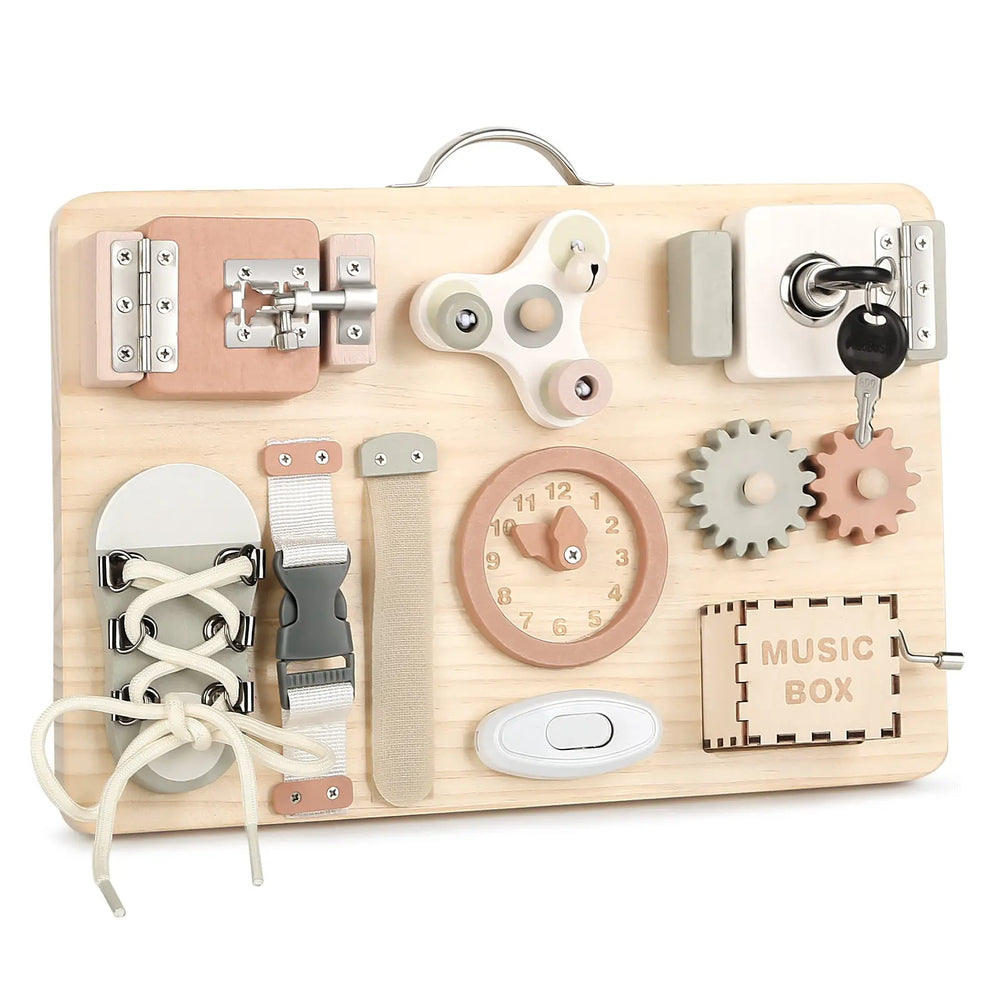
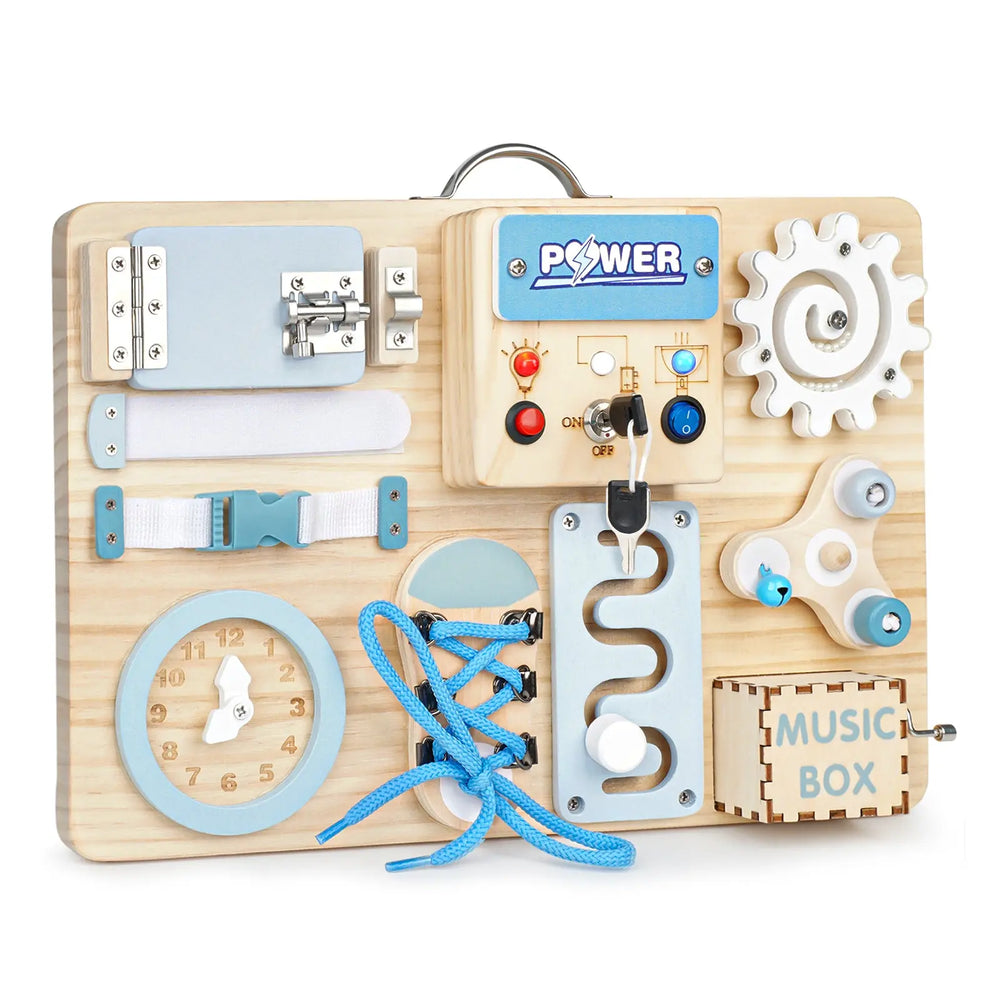
- Latches (door latch, cabinet latch, chain lock)
- Switches (light switch, toggle switch) Knobs and handles (door knob, drawer pull)
- Buckles and straps (from old bags or clothing)
- Zippers (from old clothes or fabric scraps) Buttons and buttonholes
- Velcro strips
- Wheels (caster wheels, small toy car wheels)
- Mirrors (child-safe, non-glass)
- Spinners (fidget spinner, lazy Susan bearing)
- Small doors or flaps with hinges
- Locks and keys (simple padlock)
- Gears (plastic gears from old toys)
- Calculator or old phone keypad
- Doorbell (battery-operated)
- Different textured fabrics or materials
3. Tools
- Screwdriver or drill
- Screws, nuts, bolts
- Strong adhesive (E6000 or similar)
- Sandpaper (if using wood)
- Paint or sealant (child-safe, non-toxic)
- Measuring tape
- Pencil
How to Construct your Montessori Busy Board?
1. Prepare the Base
If using wood, sand the edges and surfaces smooth to prevent splinters. You can paint or seal the base with child-safe products if desired. Let it dry completely.
2. Plan the Layout
Arrange the items on the base to get an idea of the placement. Consider the size of the board and leave enough space between items so little hands can easily manipulate them. Ensure a mix of activities.
3. Attach the Items Securely
- For items requiring screws (latches, hinges, knobs), mark the positions with a pencil. Pre-drilling small pilot holes can make screwing easier, especially in wood. Use appropriate length screws that won't protrude through the back. Ensure all screws, nuts, and bolts are tightened and covered if necessary to prevent scratching or injury.
- For items requiring adhesive (Velcro, fabric, mirrors, calculator), apply a strong, non-toxic adhesive to the back of the item and press firmly onto the board. Follow the adhesive manufacturer's instructions for drying time. Ensure they are stuck down well and cannot be easily pulled off.
- For zippers and buttons, you might sew them onto fabric scraps first, then glue or tack the fabric securely to the board.
4. Safety Check
Once everything is attached, carefully inspect the board. Ensure there are no sharp edges, loose parts, or potential choking hazards. Test each item to make sure it is firmly attached. If any screws protrude from the back, cover them with felt or another material.
How Long to Make a Montessori Busy Board?
Creating a Montessori-aligned busy board takes 2-8 hours depending on complexity and preparation. Below is a detailed breakdown:
Key Time Factors (Montessori Edition)
|
Factor |
Time Impact |
Montessori Considerations |
| Material Sourcing | 1-3 hours | Requires natural materials (wood, cotton fabric) instead of plastic |
| Board Preparation | 30-90 mins | Extra time for sanding raw wood edges smooth |
| Activity Selection | 30-60 mins | Focus on real-life skills: zippers, wooden latches, fabric ties |
| Assembly | 1-3 hours | Hand-tools preferred over power tools for authenticity |
| Safety Checks |
20-30 mins |
Non-toxic paints/oils and metal part inspection |
Step-by-Step Timeline
1. Planning Phase (1 hour)
- Sketch layout emphasizing practical life skills
- Select Montessori-approved components (wooden gears, cloth straps)
2. Material Prep (1.5-2 hours)
- Sand wooden base to silky-smooth finish
- Pre-drill holes for screw-mounted elements
- Treat wood with beeswax polish (drying time: 1 hour)
3. Assembly (2-3 hours)
- Secure items with child-safe zinc screws
- Attach fabric elements with non-toxic wood glue
- Install "real work" items: light switch, door knocker
4. Quality Control (30 mins)
- Test all moving parts 50+ times
- Remove any synthetic materials
- Check for splinters/rough edges

Are there any Recommended Brands for Montessori Busy Board?
Joyreal Montessori Busy Board Designs
-
Core Design Principles
Joyreal boards follow strict Montessori guidelines:
- Reality-Based Components (no fantasy elements)
- Natural Materials Only (wood, metal, cotton)
- Skill Progression Sequencing
- Whole-Hand Engagement Focus
- Self-Correction Features
-
Custom Design Options
Growth Adaptive KitsProgressive difficulty packs :
- Stage 1 (12-18mos): Large zippers, ring stacks
- Stage 2 (18-24mos): Buttons, shape sorters
- Stage 3 (2-3yrs): Lacing patterns, number wheels
Themed CollectionsProfession-focused skill builders:
- Little Carpenter: Sandpaper blocks, joiner's mallet
- Future Chef: Apron ties, timer knobs
- Space Engineer: Hose connectors, pressure gauges
Making a busy board is a wonderful way to provide a custom, stimulating toy for your child. Enjoy watching them discover and interact with all the different elements you've chosen!
Maintenance Busy Board Work Flow
Do
- Wipe with damp chamois cloth weekly
- Apply beeswax polish bi-monthly
- Rotate modules every 6-8 weeks
Don't
- Use chemical cleaners
- Submerge in water
- Leave in direct sunlight
Conclusion
Creating a DIY busy board is a rewarding project that combines creativity, practicality, and child development benefits. By carefully planning the design, prioritizing safety, and incorporating age-appropriate activities, you can craft a sensory-rich tool that engages toddlers and preschoolers in meaningful play. A busy board not only fosters fine motor skills, problem-solving, and cognitive growth but also offers endless opportunities for customization to match your child’s interests—whether through vibrant colors, themed decorations, or educational elements like numbers and shapes.
This project is perfect for parents, caregivers, or educators seeking an affordable, hands-on way to spark curiosity and learning. With basic tools and a little imagination, you’ll build a timeless toy that grows with your child while encouraging independence and exploration.
Maybe it will be helpful for you:
Recent Post

Buy Once, Play Longer with Joyreal Toys
“We’re tired of toys that only last a weekend.”“I want toys that gr...

Love Is Learning Together: Valentine’s Day Educational Toys by Joyreal
When we think of Valentine’s Day, our minds often drift to roses, c...

A New Year, A New Beginning: Joyreal Toys’ Wish for Every Child
A Heartfelt New Year Message from Joyreal Toys As we welcome 2026, ...

Can Montessori Wooden Toys Grow With Your Child From 1 to 4?
When Your One-Year-Old Plays for Two Minutes and Walks Away It’s a ...

Mini Piano or Drum Set — Which Is Best for Kids?
As parents, we all face the same struggle — our children spend hour...

Is Phonics-Based AAC Right for Your Nonverbal Child?
Why Nonverbal Children Need AAC Devices For many parents, finding a...

Picture-Based AAC or Phonics AAC? A Parent’s Guide
Phonics vs Picture-Based AAC: Which Communication Tool Is Right for...

How Does Music Enlightenment Work for Ages 0–3?
Why Age-Specific Music Enlightenment Matters (0–3 Years) The first...

What Age Is a Noah’s Ark Toy For?
Is a Noah’s Ark Toy Good for Toddlers (Ages 1, 2 & 3)? When par...

Why Noah’s Ark Is More Than Just a Story Toy?
When parents search for a wooden Noah’s Ark toy, they’re usually no...


